Showing posts with label quick recipes of the week. Show all posts

Monday, March 4, 2013

- quick recipe of the week -


Hello and Happy Monday to you! Can you believe it's March already?!? This year is already flying by!

Today I'd like to introduce you to Kristin from, About a Girl. I just recently started following Kristin's blog, and I already love it! She has some really awesome recipes on her blog, so you should definitely go check them out! And how cool is this...Kristin is a real life rock star! No, for reals, her and her boyfriend, Aaron, are in a band together, called Larrikin. You have to go check them out and listen to some of their tunes! Besides playing in their band, Kristin loves spending her time taking pictures, cooking or baking, drawing and watching movies, especially ones from the '80s! She lives in Winnipeg, Canada with Aaron. They met on the internet years ago and in 2005 he came to Canada from Australia to meet her, where they fell in love and have been together ever since.

Image credit Kristin
Kristin is sharing a delicious dessert recipe with us today! I can't wait to try it out! And speaking of being March, these would be super fun for a St. Patrick's Day treat...just add some green food coloring!

White and Milk Chocolate Peanut Butter Cups
Baker's semi-sweet chocolate
Baker's white chocolate
1 teaspoon vanilla extract
a dash of salt
4 tablespoons of peanut butter
small or medium cupcake papers

Take 2 squares of each chocolate (white + semi sweet) and melt them in separate bowls in the microwave for about 30 seconds - 1 minute (microwaves vary, so check on your chocolate to make sure it is not burning. You're going to start by making the bottom part of the cups, so take some melted semi sweet chocolate in a teaspoon and lightly line the bottom of the cupcake papers with it. Don't fill them, you are just making a shell but make sure the sides are high enough to hold the filling, so I'd say take them about 1/2-3/4 of the way up the side of the paper. Just use your spoon to drop some chocolate to the bottom of the paper, make sure it's all covered, and then smear it around the sides to make the shell. Repeat with the white chocolate in separate cups as well to have a variety. Once done all the cups, place them on a plate or baking sheet and then into the freezer for at least 10 minutes (can be longer). While the cups are chilling, make the peanut butter mixture. Take the peanut butter and melt it in the microwave for about 15 seconds (you just want it to be soft enough to work with). Then mix in the salt and vanilla. Once the chocolate shells are ready, take them out of the freezer and fill them with the peanut butter mixture. Be sure not to fill them higher than you've made the chocolate shells. I then put them back in the freezer for 10 mins, however you may be able to skip this step and just move onto the next one (it's not the way I did it, but looking back it might not have really mattered to freeze the filling). After another 10 mins. in the freezer, take the cups out. Melt 1 square of each chocolate again (semi sweet & white, separately) and then spoon a small amount on each cup and cover to create a top. I mixed it up and made some entirely white chocolate, semi sweet chocolate, or I put a little bit of each and swirled it around. Once done, place back in the freezer for the final chilling. Keep them in there for at least 10 minutes, however the longer, the better. I left mine for about an hour and a half. Be sure to keep any leftovers in the fridge/freezer because they might melt if left on the counter.

Image credit Kristin

Thank you so much Kristin! These look delicious! I know a certain husband that would love me forever if I whipped up a batch of these for him!


Monday, February 25, 2013

- quick recipe of the week -


Happy Monday! Hope everyone had a fabulous weekend! We sure did! Now it's back to work, back to the grind, and only four more days until the next fabulous weekend!

Here is the - quick recipe of the week - for you. Another crock pot recipe that I found through my Crockin' Girls cookbook. I've made it a couple different times now, and it has always turned out great!

White Chicken Spaghetti
5 to 6 boneless skinless chicken breasts
1 block low fat cream cheese
1 package Italian dressing dry seasoning
1 can low fat cream of chicken soup
1 (16-ounce) package spaghetti noodles

Combine chicken, cream cheese, seasoning, and cream of chicken soup in the slow cooker. Cook on LOW for 6 hours. Before serving, cook spaghetti noodles according to package directions and add to chicken mixture.

Image credit http://crockingirls.com

It's really as easy as it looks, and it's one of the better "simple" recipes I have tried in a long time! Super kid friendly, and perfect for those busy weeknights! Enjoy!

Monday, February 18, 2013

- quick recipe of the week -


Hi folks! I'm back today with another recipe to share with you, and another blogger to introduce you to! Meet Lisa from 3 Girls and 1 Boy. She's a wonderful person, and an awesome IG friend of mine :-) Lisa is a mom to 2 beautiful little girls and a proud Navy wife. She loves to create things out of nothing and she has a lot of crafting tutorials, as well as furniture makeovers that she blogs about. She also features a lot of quick, family friendly recipes on her blog that you DEFINITELY have to go check out!

Image credit Lisa
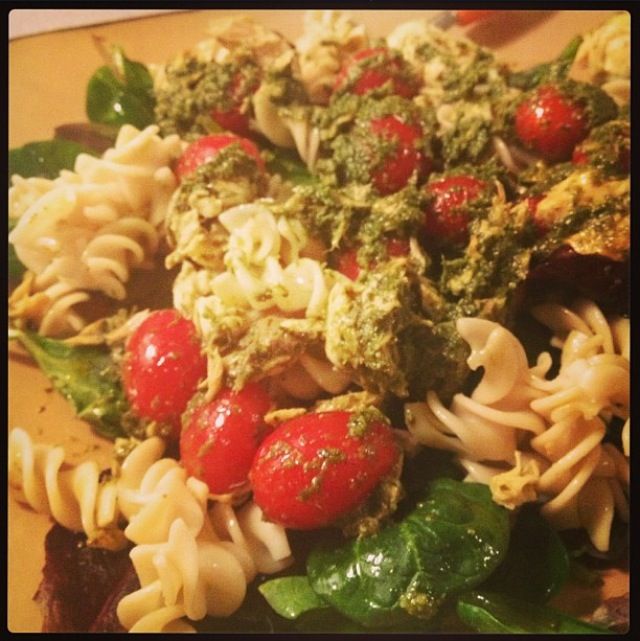
Pesto Pasta Salad
4 cups fresh basil leaves, packed
1 cup grated Parmesan or Romano cheese
1/2 - 1 cup extra virgin olive oil (just watch how it mixes)
1/2 cup pine nuts
6 tablespoons garlic cloves, minced
Salt and freshly ground black pepper to taste
cooked pasta
1 container cherry or grape tomatoes

Combine the basil with the pine nuts, pulse a few times in a food processor or blender. Add the garlic, pulse a few times more. Slowly add the olive oil (watch the consistency of the pesto and stop when it's how you like it) while the food processor is on (make sure the blender is off if you use a blender). Stop & scrape down the sides of the food processor with a spatula. Add the grated cheese and pulse again until blended. Add a pinch of salt and freshly ground black pepper to taste.

Mix the cooked pasta and the tomatoes up in a bowl with the pesto mixture. Top with more Romano or Parmesan cheese if desired.

Image credit Lisa

Thank you so much Lisa! This looks like a great, healthy salad that can be a meal of it's own, or a great side dish. And it's easy to make, which are always my favorite kinds of recipes!


Monday, February 4, 2013

- quick recipe of the week -


Hello everyone, I hope you all had a wonderful weekend, and had fun watching the Superbowl...if that's your thing! Matt was away on a guys trip this weekend, so I had a pretty mellow Superbowl with Ellie. But it was still fun, and, as usual, I was mostly just paying attention to the commercials, since I had no attachments to either team playing.

Today, I am pleased to introduce you to Tani, from, for the life of Tani Bree & her loves. Tani and I have been following each other's blogs for quite some time...she was one of the first blogs I started following actually! I've watched her beautiful little girl, Brielle, grow, and have followed her throughout her long, and emotional journey to get pregnant a second time...which she now is (I was ecstatic when I heard the news...oh yeah, and it's a little boy!!!) Tani just has the sweetest soul ever, and she's just amazing!

Image credit Tani

In addition to writing about herself and her family, she often writes about food, crafting, fitness, photography, songwriting, and clothes. Being a wife and a mother is so deeply satisfying to her, and she is always looking for more ways to make the story of her family a story worth cherishing.

Cheesy Jalapeño Popper Baked Stuffed Chicken
2 slices center cut bacon, cooked and crumbled
3 jalapeños, chopped (remove seeds for milder)
3 oz 1/3 less fat cream cheese, softened
4 oz reduced fat shredded cheddar jack
2 tbsp chopped scallions
8 thin sliced skinless chicken breast cutlets, 3 oz each
1/2 cup Italian seasoned whole wheat breadcrumbs
1 1/2 lime juice
1 tbsp olive oil
salt and fresh pepper
olive oil non-stick spray

Wash and dry chicken cutlets, season with salt and pepper. Preheat oven to 450°. Lightly spray a baking dish with non-stick spray.Combine cream cheese, cheddar, scallions, jalapeño and bacon crumbles in a medium bowl. Lay chicken cutlets on a working surface and spread 2 tbsp of cream cheese mixture on each cutlet. Loosely roll each one, secure the ends with toothpicks to prevent the cheese from oozing out.Place breadcrumbs in a bowl; in a second bowl combine olive oil, lime juice, salt and pepper. Dip chicken in lime-oil mixture, then in breadcrumbs and place seam side down on a baking dish.Repeat with the remaining chicken. When finished, lightly spray the top of the chicken with oil spray. Bake 22-25 minutes, serve immediately.

Image www.skinnytaste.com


This look amazing! Thanks for sharing Tani! I absolutely love stuffed chicken...it turns regular chicken into AMAZING chicken!

Go say hi to Tani, and get to know her and her family. You'll be so glad you did! She's just plain awesome!


Monday, January 28, 2013

- quick recipe of the week -


Happy Monday to everyone! Hope you guys had a fabulous weekend! Over the weekend, I actually stumbled upon a great blog called, Family Fresh Meals, that has a ton of amazing, family friendly recipes! You should definitely check it out! Today's recipe comes from that blog...and, of course, it's a crock pot recipe...cause I absolutely love using my crock pot! Anytime I can have dinner ready for me as soon as I walk in the door, I'm all for that!

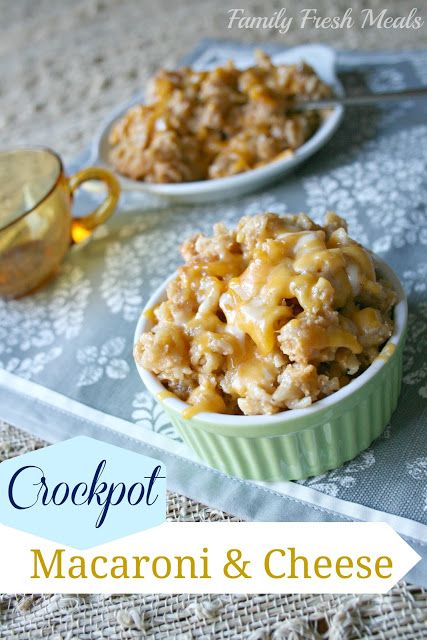
Crockpot Macaroni and Cheese
1 box (13.25oz) of rotini, shell or macaroni pasta
4 Tbs butter
4 cups shredded cheese (I used a Colby-Jack blend, but Cheddar would work great too)
4 oz cream cheese, at room temperature, cubed
1.5 cup of milk
-12 oz evaporated milk
1/4 cup sour cream
1/2 tsp salt
1/2 tsp pepper
1/2 tsp paprika

In crock pot mix together butter, cream cheese, milk, evaporated milk, sour cream, salt, pepper and paprika. Try to stir out as many lumps as possible. Stir in UNCOOKED noodles. Top with shredded cheese. (DO NOT mix at this point. The cheese will melt and make it’s way through the noodles. Cover and cook on LOW for 3-4 hours.

Image credit http://www.familyfreshmeals.com

Looks delicious doesn't it? Yeah, who doesn't love homemade macaroni and cheese?? Try it, I'm sure you'll like it!!


Monday, January 21, 2013

- quick recipe of the week -


If you haven't tried quinoa yet...you definitely should! I'll admit, I was a little scared of it at first, and Matt still won't eat it, unless he can't tell that he's eating quinoa...but it's packed with protein, and is very good for you!

Here's a recipe for a simple quinoa dish with enough flavor, that even my husband wouldn't know he's eating quinoa!

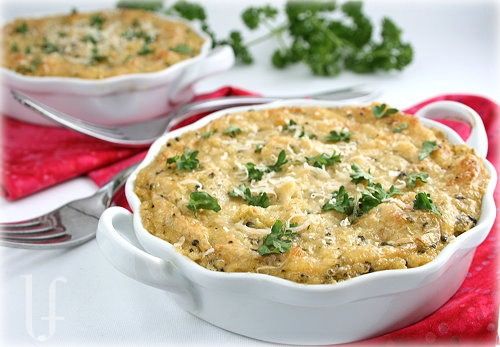
Broccoli Quinoa Casserole
one 10 oz can condensed cream of broccoli soup
1/3 cup reduced fat mayonnaise
2 tablespoons milk
1 1/4 cups reduced fat shredded cheese (cheddar, colby-jack, etc)
1/2 teaspoon Splenda/sugar
1/4 teaspoon black pepper
dash freshly grated nutmeg
2 cups cooked broccoli
1 1/2 cups COOKED quinoa
freshly grated Parmesan cheese

To cook quinoa:
3/4 cup quinoa
1 1/2 cups water
1/4 teaspoon salt

Rinse quinoa in a fine sieve until water runs clear. In a small saucepan combine the quinoa, water, and salt. Bring to a boil over high heat. Reduce heat to low and cover. Cook for 18-20 minutes, or until fluffy and the white ring/tail is visible. Fluff with a fork. Preheat oven to 350 degrees and coat a shallow (8×8 in or 5-6 cups) casserole dish – or individual ramekins – with vegetable cooking spray. In a large bowl combine the soup, mayonnaise, milk, shredded cheese, Splenda, pepper, and nutmeg until well mixed. Stir in the quinoa and broccoli. Spoon mixture into prepared casserole. Sprinkle on a couple tablespoons of Parmesan and bake for 35-40 minutes or until bubbly on the edges and golden.

Image credit http://eatingwelllivingthin.wordpress.com

Super flavorable, packed with protein, and easy to make! Try it out...you might just find that you have a new found love for quinoa!


Monday, January 14, 2013

- quick recipe of the week -


Happy Monday everyone! I hope everyone had a stellar weekend! Ours was full of good friends, and lots of food, and a little bit of football. I was able to have a relaxing spa pedicure on Sunday morning...a well needed break. And Matt earned the "Super Dad" award when he chose to take Ellie to the park instead of going to the bar to watch football with his buddies. She enjoyed her Daddy-Ellie time so much! Overall, a great weekend!

Today, I'm super super excited for you to meet Katie, from Standpipe and Sprinkles. Katie left the sweetest comment on one of my blog posts about 3 months ago, and we've been fast friends ever since! She is seriously one of my the coolest, most friendly bloggers I have ever met, and I adore her. We chat through our blogs and IG everyday, and I love always being able to talk about our day, ask her a question, or just say a quick hello! If only we lived closer! One of the reasons we clicked so fast is because her darling little girl had similar health problems as Ellie had when she was a baby. It's always nice to hear from other momma's that had to deal with the same things you had to deal with. It definitely makes me feel like I wasn't crazy back then, and that others had to weather the same "serious reflux and eating issues" storms.

Image credit Katie
Katie lives in the suburbs of Denver, Colorado, where she raises her sweet daughter, Maile, who will be 2 in the spring! Katie has been married to the love of her life for going on 6 years. The family also includes two spaniels, and a very persnickety old cat. Katie spends most of her time reading books with her little one, going down the slide at the park 10,000 times, painting and playing pretend, and dreaming of growing all her own food.

Sweet Thai Chili & Creamy Goat Cheese Dip
12 oz White French loaf
Butter, or your favorite buttery spread (I like Earth Balance Soy-Free Natural Buttery Spread)
Parsley flakes, if desired
Rosemary
Thai sweet chili sauce (I use Mae Ploy, because it is most available in our area)
6 oz fresh goat cheese

Preheat oven broiler on low setting.Cut bread into slices, about 1/4 to 1/2 inch thick. Butter, to taste. Arrange slices on a nonstick baking sheet, then sprinkle with rosemary. Broil sliced bread until the edges are golden brown, about 5 minutes. Remove to serving plate. In a small serving dish, pour Thai sweet chili sauce over goat cheese (I use about 1/3 cup per 6 oz cheese). Garnish with parsley flakes. Dip or spread, enjoy ... and be prepared to share this recipe!

Image credit Katie

How amazing does that sound?? Perfect for a Superbowl appetizer! Or for a dinner party! Or just for an appetizer before dinner!

Thanks so much Katie for sharing this delicious dip with us. Now only if we lived closer so we could enjoy it together! Because I know our girls would get along grandly! :-)

Please go say hi to Katie. You'll love her! Like, you will really really adore her! She's just plain awesome!


Monday, December 31, 2012

- quick recipe of the week -


Happy New Year's Eve to everyone!! I hope everyone has some exciting plans tonight and everyone stays safe! We have spent every New Year's Eve since Ellie was born in the comfort of our own home. It's the one night of the entire year, that we really don't have a babysitter available to us, and actually, it's not really such a bad thing. Gone are the days of clubbing, ringing in the new year at fancy restaurants, and staying out till 2 a.m. Nowadays, we get into comfortable clothes, sometimes invite friends over to join us, and just hunker down at home to watch the count down on tv. We haven't ever kept Ellie up till midnight, and don't plan to this year. That little girl already has enough sleeping issues...I don't want to create another one by allowing her to stay up that late...even if it's a special occasion!

I do plan to get back to more regular blog posts once the craziness of the holidays end. Until then, here's a super simple easy New Year's drink recipe for you! Enjoy!

Cotton Candy Champagne
cotton candy
champagne (or sprite/sparkling water)

Fill the glass with a handful of cotton candy. Pour champagne over the cotton candy. Serve immediately and enjoy!

(Image credit Smarty had a Party)

Have a safe and Happy New Year's Eve! Here's to 2013!


Monday, December 24, 2012

- quick recipe of the week -


Merry Christmas Eve to you all! This post is going to be short and sweet today...I'm sending you over to Tiffany's amazing blog for today's quick recipe of the week!

Enjoy (and thanks Tiff, for letting me take an easy way out today! Love ya hon!)

Monday, December 17, 2012

- quick recipe of the week -


Wow, what a heart wrenching past couple of days we have had, huh? I'll leave my thoughts and feelings for another post, but my heart is breaking for everyone touched by the horrible shooting at Sandy Hook Elementary School. Every time I so much even think about it, the tears start flowing. It's so, so devastating and horrific...

Whew...(pause while I collect myself once again)...

Okay, today I am recycling an old recipe I have posted before...because it is an absolute must for the holidays, and it's also something fun the kids can help you make. Quality time with their kids should be everyone's number one priority after what happened on Friday, and this is definitely something that is very toddler friendly!

Puppy Chow
9 cups Chex cereal
1 cup semi sweet chocolate chips or baking chips
1/2 cup creamy peanut butter
1/4 cup butter
1 tsp vanilla
1.5-2 cups powdered sugar

Melt the chocolate chips, peanut butter, and butter in a pot over the stove, or in the microwave. Add the vanilla to the mixture. Pour Chex cereal into a large mixing bowl and pour the chocolate mixture over the Chex. Mix gently until cereal is fully coated with chocolate. Pour powdered sugar into a large ziploc bag. Spoon the Chex in to the bag and shake until coated with powdered sugar. Cool and enjoy!

(Image credit http://storyofmylifetheblog.blogspot.com)

*Hint, the part that is so much fun for the kids to help out with is the "shaking in the bag" step...although, you might want to double bag your mixture if your kid is an especially strong "shaker"...ha ha!

You'll love to have bowls of this around your house this holiday season...but be careful...it's addicting!


Monday, December 3, 2012

- quick recipe of the week -


We had an amazing and very relaxing time on vacation! A post will follow soon with pictures, and details...after I finish unpacking, settling back in to reality...oh, and kicking this cold I seem to have picked up some where between Puerto Vallarta and home. Ugh!

Today's recipe will be a hit at your next holiday party or potluck! Enjoy!

Pizza Dip
4 ounces cream cheese, room temperature
1/4 cup sour cream 4 ounces cream cheese, room temperature
1/4 cup sour cream
1/4 cup mayonnaise
1/2 cup mozzarella, grated
1/4 cup parmigiano reggiano (parmesan), grated
1 cup pizza sauce
1/2 cup mozzarella, shredded/grated
1/4 cup parmigiano reggiano (parmesan), grated
2 ounces pepperoni, sliced
2 tablespoons green pepper, sliced
2 tablespoons black olives, sliced

Mix the cream cheese, sour cream mayonnaise, mozzarella and parmigiano reggiano and spread it across the bottom of a pie plate. Spread the pizza sauce on top and sprinkle on the cheese, pepperoni, green pepper and olives. Bake in a preheated 350F oven until the sides are bubbling and the cheese cheese has melted and turned golden brown on top, about 20 minutes. Dip or use as a spread on slices of baguettes or other breads/crackers.

(Image and recipe credit http://www.closetcooking.com/)


Looks good, doesn't it? It's definitely as good as it looks, I promise. Maybe not very low fat, but that's why you can just save it for your holiday get togethers when everyone is supposed to indulge!

Now I'm off to download the millions of vacation pictures I have sitting on my camera...I'll be back soon with my vacation post!


Monday, November 26, 2012

- quick recipe of the week -


Sooooo, turns out I took an unintentional break from my blog this week. With the Thanksgiving holiday, and get togethers with friends and family, and Matt and I off of work for 5 days straight, I just found us so busy, and blogging was put on the back burner. We did have a wonderful break from work, and a wonderful Thanksgiving with both friends and family. Unfortunately, I have no pictures of either of our Thanksgiving dinners (yes, we had two). I took a break from my camera to really enjoy the festivities, so alas, you guys will just have to imagine how our Thanksgiving looked.

We actually leave later this week on a little vacation, and I am so.darn.excited! I won't be blogging (leaving my laptop at home!), but you can definitely find me on Instagram (user name, kynad) to follow us on our adventure!

Today I am sharing with you a super easy, kid friendly recipe that I found on Pinterest (well, adults like it too, but it's super kid friendly!) I don't know many kids who don't like it, except of course, my kiddo, who won't touch anything with sauce on it. She says sauce makes her food "dirty"...and she will only eat her food if it's "clean" (sans sauce). Yup, that's Ellie for you! Lol!

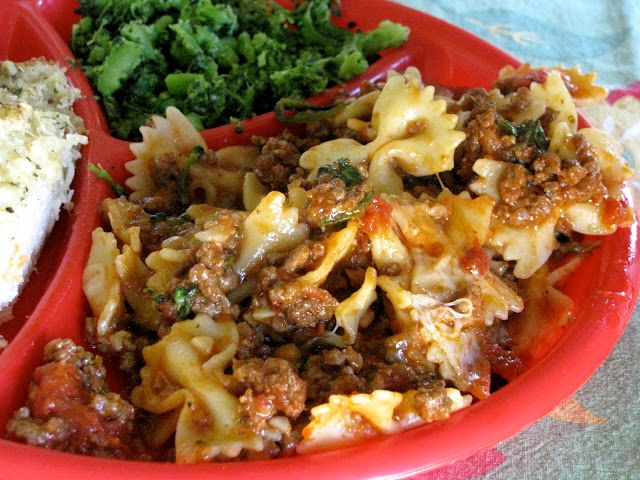
Crockpot Ravioli Casserole
1 1/2 lbs. lean ground beef or turkey
1 onion, chopped
1 clove garlic, minced
1 (15 oz.) can tomato sauce
1 can stewed tomatoes
1 tsp. oregano
1 tsp. Italian seasoning
salt/pepper to taste
10 oz. frozen spinach, thawed, or fresh spinach, washed
16 oz. bowtie pasta, cooked
1/2 cup parmesan cheese, shredded
1 1/2 cup mozzarella, shredded

Brown ground beef/turkey with onion and garlic. Put in crock-pot and add sauce, tomatoes and seasonings. Cook for 6-7 hours on low. Add the last 4 ingredients during the last 30 minutes of cooking and turn crock-pot to high.

(Image credit and recipe credit http://becomingbetty.blogspot.com/)

It's seriously an easy week night dinner that will be a hit with both kids and adults alike! I hope everyone has a great week, and please come follow me on Instagram (user name, kynad) for pictures of our exciting upcoming vacation (have I mentioned how darn excited I am?) Now, I should probably get to packing! Have a wonderful week!


Monday, November 19, 2012

- quick recipe of the week -


Hello and happy turkey week to you! Hooray to short work weeks! We had a fairly uneventful weekend, but sometimes that's okay!

Today I am featuring an amazing and awesome blogger that I have known for quite some time now. Christine from, Apartment 46. I adore Christine! She's such a sweetheart, and such wonderful mom to her adorable boy named, Sam (that I promise you will just fall in love with). Christine is a wife-mama-nurse, residing in the soggy land of Portland, Oregon. She loves garage sales, sweaters large enough to double as throw blankets, and she likes my coffee off-white. Anything with sugar is her favorite food. And while she may be many things, she claims that ‘chef’ is not one of them. So today she is sharing a super easy, no bake recipe with us. Christine promises that if you whip this up, you will probably be nominated for the title of Best-Chef-Woman-in-the-Whole-Western-Hemisphere {or something of the like} when you serve it at your next dinner party.

(Image credit Christine)

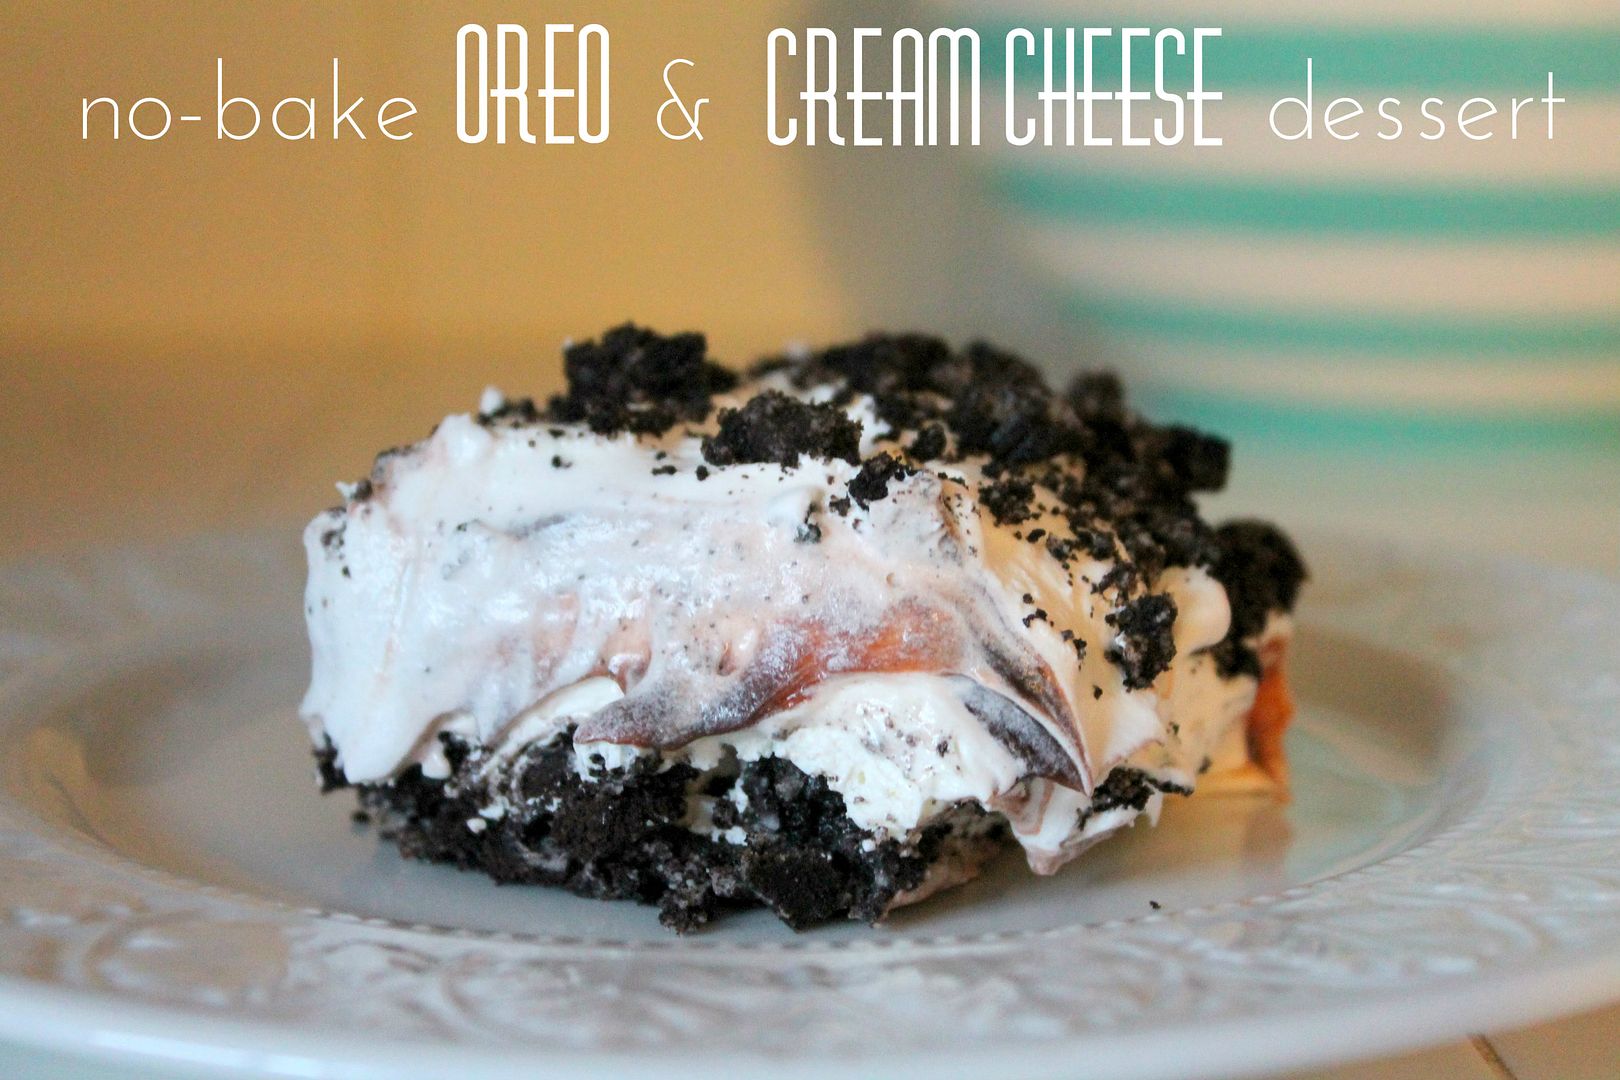
No Bake Oreo & Cream Cheese Dessert
1 package regular Oreos
½ cup butter, melted
1 large box of instant chocolate pudding
16 oz cool whip
8 oz cream cheese, softened
1 cup powdered sugar

Crush the whole package of Oreos—I did this with a bag and a rolling pin, but you could also do this with a food processor. Set aside ½ cup of the cookie crumbs to sprinkle on top when you are done. Spread the remaining crumbs in the bottom of a 13x9 pan. Pour melted butter on top of
the cookie crumbs. Mix butter and cookie crumbs well, then press firmly into bottom of the pan,
forming your crust. Make the chocolate pudding as instructed on the package and allow it to set in the fridge. In a separate bowl, blend the cream cheese and powdered sugar until smooth. Then fold in 8
ounces of cool whip. Top the Oreo crust with the cream cheese mixture, then add the layer of pudding. On top of that, spread your last 8 ounces of cool whip and lastly sprinkle the top with the cup of Oreo crumbs. Cover and refrigerate until ready to serve.

(Image credit Christine)

This would be the perfect dessert to serve this week at your Thanksgiving dinner if you are looking for a yummy alternative to pumpkin pie! (or, even better, serve it in addition to your pies! No one counts calories on Thanksgiving do they?)

Now, run over to Christine's blog and thank her for this delectable recipe! And while you're there, get to know her! I promise you will love her as much as I do! She's simply the best!


Monday, November 12, 2012

- quick recipe of the week -


Happy Monday everyone! We had an amazing birthday party for an almost three year old (T minus 4 days). It's crazy how much older Ellie seems already. She acted so grown up this weekend...it was fun to watch, but also sad for this momma.

Today I am sharing a super, super yummy and easy recipe. Say hello to these babies...

Taco Stuffed Shells
1 lb ground beef or ground turkey
1 package taco seasoning
1 four ounce package cream cheese
12 large pasta shells
1 cup salsa
1 cup taco sauce
1 cup cheddar cheese (shredded)
1 cup Monterey jack cheese (shredded)
1 ½ cups tortilla chips (crushed)
3 green onions (chopped)
1 cup sour cream

Cook the ground beef/turkey and add taco seasoning. Prepare according to package directions. Add cream cheese cover and simmer until cheese is melted. Blend well. Set aside and allow to fully cool. While burger is cooking cook the pasta shells, drain and toss well with butter. Pour salsa in the bottom of a 9 x 13 inch baking dish. Stuff each shell with the meat mixture. Place the stuffed shells in the baking dish and cover the tops of the shells with taco sauce. Cover and bake in the oven at 350 degrees for 30 minutes. After 30 minutes, uncover, and sprinkle crushed chips and shredded cheddar and Monterey jack cheeses on top. Cook for about 15 more minutes. Serve with sour cream, additional salsa, black olives or whatever you think goes good with tacos!

(Image credit http://blogchef.net/)


Monday, November 5, 2012

- quick recipe of the week -


Happy Monday everyone!

We had a great weekend...but can I tell you how not excited I am about daylight savings?? Ugh! Let's face it...we really don't get an extra hour of sleep with a toddler in the house, and I hate how dark it gets so early. As much as I love all the holidays that winter brings, I'm not going to lie...I don't love the darkness, the cold weather, and everything else that comes along with this season. 

Today, I am super excited to introduce you to Leah, from Beautifully Molded. Leah has a pretty amazing blog...the thing I like best about her?...she's so real on her blog. I absolutely love reading blogs that are about real, every day life! Leah loves to cook, (although she may not ALWAYS have the energy to). It's where she can be creative to her heart's content. She really would love for her family to enjoy more healthy options, so she tries to sneak in veggies whenever she can. She has three children and a husband that keep her hands full, and are the loves of her life!

(Image credit Leah)
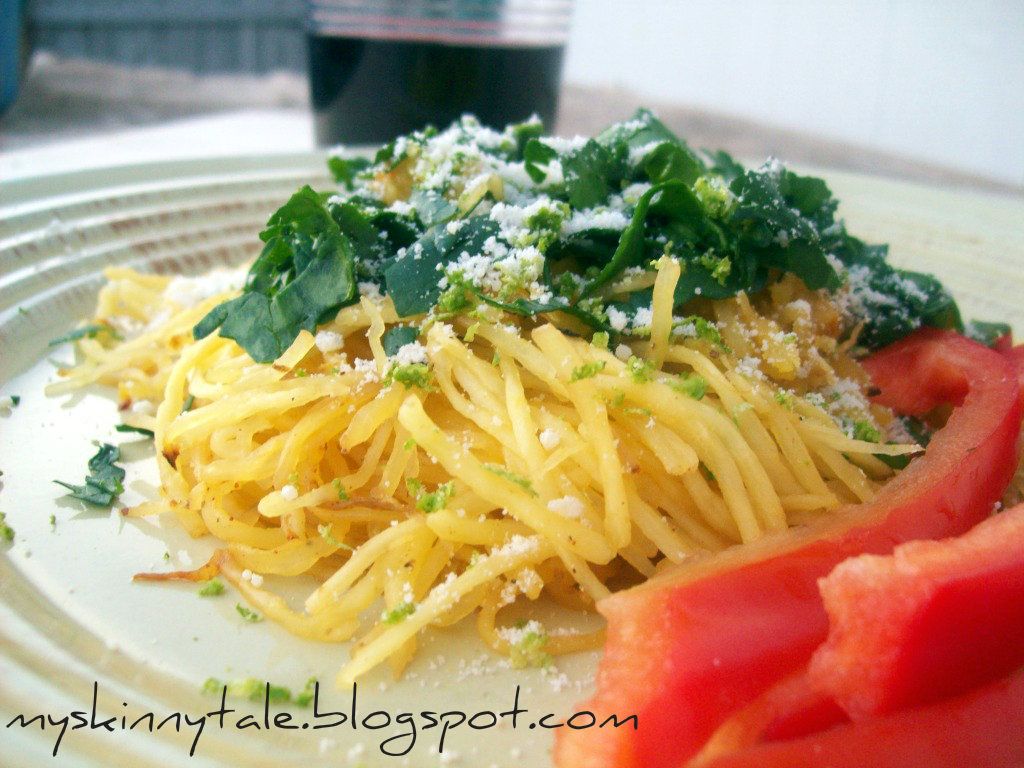
Lemon & Spinach Spaghetti Squash
1 medium spaghetti squash (a large one and will make about 4-6 servings)
2 handfuls of spinach
3 tbsps of lemon zest
olive oil
paprika
salt & pepper
Italian herbs seasoning
Parmesan cheese
chopped red bell pepper

Preheat oven to 375 degrees. Cut spaghetti squash lenght wise. Scoop up threads and seeds and set aside. Drizzle olive oil on spaghetti squash and season with paprika, Italian seasoning, salt and pepper to taste and rub into squash.Place halves face down on cookie sheet and heat for 55 minutes or until completely tender. Take out of oven and with a fork, fluff out the 'noodles' onto a large bowl.Chop spinach and toss with spaghetti squash. Zest lemon over spaghetti to your liking. Top with Parmesan cheese and serve with red bell peppers.

(Image credit Leah)

If you've never tried spaghetti squash before, you should know that's it's pretty darn tasty, so don't be scared of it just because it's squash. But you should also know, that as much as it looks just like pasta (it's uncanny really), don't expect it to taste just like pasta. After all, it is squash...(even though it has "spaghetti" in it's name).

Thank you so much Leah! This is definitely a great way to get our veggies in! Please go say hello to Leah and check out her blog. And try this recipe out...it looks so good!

Monday, October 29, 2012

- quick recipe of the week -


Pumpkins were carved, football was watched, smiles were seen, fun was had, and tantrums were thrown, time outs were given...just a typical weekend in our house!

Today I am featuring such a beautiful blogger, both inside and out. I just recently got to know her through her blog, and she inspired me in so many ways. Meet Heather, from Live.Love.Laugh. Heather is an amazing wife of 3 years to her husband, Derek, and a stay at home mom to Brayden, her special needs toddler. Their son has Cerebral Palsy and is the light of their life. Normal looks a bit different in their house but they still have the same ups and downs as any parent. Heather loves to cook and shop! She is turning 30 at the end of the year and is fully embracing this upcoming new chapter in her life!

(Image credit Heather)

If you want to get to know Heather, and her adorable son better, a good place to start is right here. I promise their story will inspire and awe you in so many ways. Heather and Derek are amazing parents!

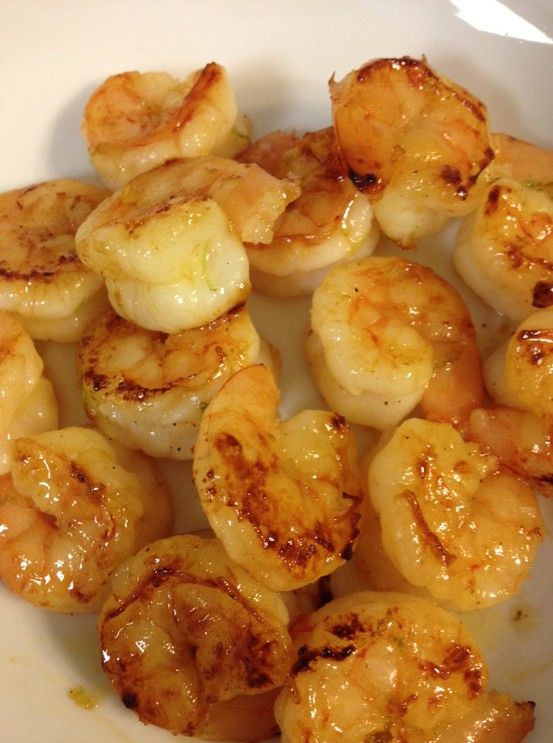
Honey Lime Shrimp
1/2 pound large shrimp, peeled and deveined
1/4 cup olive oil
2 Tbs honey
juice of one small lime, or half a large lime (2-3 T)
zest of one small lime, or half a large lime
2 cloves garlic, smashed
1/2 tsp kosher salt
1/4 tsp black pepper
1/4 tsp red pepper flakes

In a large ziploc bag, combine all the marinade ingredients. When everything is well-combined, add the shrimp, squeeze as much air as possible out of the bag, and close it up. Place it in the fridge. Let the shrimp marinate for 30-60 minutes, flipping the bag around once or twice during that time, so that all the shrimp stay evenly covered in the marinade. When you’re ready to cook, take the shrimp out of the fridge and let them sit at room temperature for about 10 minutes. Heat a large skillet over medium-high heat; there is no need to add any oil or butter to the pan, as the marinade has enough oil in it to keep the shrimp from sticking to the pan. (If you would prefer to use the grill for these, you can thread them onto skewers and toss them on the grill at this point.) Add your shrimp to the pan in a single layer, making sure they are not too crowded; you can always cook them in more than one batch. Let them cook on one side for about a minute, until they curl up and start to turn pink. Flip them over, and cook for another 30 seconds or so, until the shrimp are opaque. Remove from the pan, and serve immediately!

(Image credit Heather)

Yummy! I LOVE shrimp, but I so rarely cook it. This sounds amazing though, and it's an easy recipe too! Thank you so much Heather, for sharing this today! And thank you for sharing your blog! I hope everyone has a great week, and please, go say hi to Heather!

Monday, October 22, 2012

- quick recipe of the week -


Happy Monday everyone! We finally got a chilly weekend (I got to bust out my boots!)...and I would like to think that meant fall was finally here in our part of the country.  But alas, a peek at this week's upcoming weather shows temperatures back up in the 80's by Thursday. I know I shouldn't complain, but sometimes the grass is just always greener on the other side, right? I'll be sure to remind myself how much I love our warmer climate though, when fall has past and other people are experiencing freezing cold temperatures, and I'm barely having to wear a jacket, let alone a heavy winter coat!

Even though we don't have any cold weather to escape, my hubby made my weekend by mentioning the possibility of a little vacation coming up in November to a warm, tropical place. Fingers crossed we can make that happen! Even though we'll have Ellie with us, she is an awesome traveler and I know we will all have a great time relaxing in the sun.

So, today I am sharing another super easy recipe that I found on none other than Pinterest (seriously, what did we do before Pinterest?)

Mexican Chicken
1 pound boneless chicken breasts
1 Tbs taco seasoning
Salt, to taste
1/2 cup enchilada sauce
4 ounces cheddar cheese, shredded
3 green onions, chopped

Sprinkle the chicken on both sides with taco seasoning; grill or saute. Cut the chicken into cubes and place in a greased 8x8" baking dish; season with salt to taste. Add the enchilada sauce and toss to coat the chicken. Sprinkle the cheese over the chicken and bake at 350 for 10-20 minutes or until the cheese is bubbly. Sprinkle the green onions on top and serve.

(Image credit http://www.genaw.com)

I'm also sponsoring a blog hop today! Come join me over here, and meet some new blogging friends!

Photobucket


Monday, October 15, 2012

- quick recipe of the week -


It's that day again....Monday...when it all starts over again! We had a good weekend...picked out our pumpkins and spent some quality time with some good friends. All in all, a great weekend!

Today I am sharing another Pinterest recipe I found. It's a great, kid friendly recipe. And they are super easy to make!

Taco Bites
1.5 tsp chili oil (regular olive oil works too)
1/2 lb ground turkey, beef, or chicken
1 Tbs taco seasoning
3/4 cup black beans (drained and rinsed)
16 wonton wrappers
5 Tbs of queso dip
1 cup chunky salsa
1 cup Mexican shredded cheese

Pre-heat the oven to 375. Lightly mist 8 cups in a muffin tin with cooking spray and set aside. Heat chili oil (or Olive oil) in a saute pan or large skillet over medium-high heat, add the ground beef and taco seasoning and brown beef, breaking it with a spoon. Add black beans and continue to cook, stirring occasionally, for a few minutes until warm. Push a wonton wrapper into the bottom of each of the eight sprayed cups in the  muffin tin. Spoon a teaspoon of queso dip into each wonton wrapper and spread across the bottom.Follow by spooning some of the meat/beans mixture into each cup and then spooning a teaspoon or so of salsa on top of that. Sprinkle a pinch of the cheese evenly over the top of each cup. Bake for 18-20 minutes until golden brown. Let cool for 5 minutes before removing from muffin tin. 

(Image credit http://bricelife-gabrielle.blogspot.com/)

Perfect toddler recipe! And quick and easy! What would I do without Pinterest? Ha ha!


Monday, October 8, 2012

- quick recipe of the week -


Hello folks, how is everyone doing on this lovely Monday? We had a great weekend...complete with a date night Saturday evening! Drinking wine at the top of Matt's office parking garage...sounds romantic, no? Actually, we were watching a spectacular fireworks show from the nearby stadium, and his office was the perfect, (and free), location to camp out with our beach chairs and our bottle of wine! We had a great time!

Today, I'm excited to feature a gluten free recipe from Megan. Megan blogs over at Absolute Mommy. Megan blogs about all things revolving around motherhood, pop culture, and her obsession with Instagram.

(Image credit Megan)
She told me she was shocked (and humbled...awe, thanks Megan) when I asked her to contribute a recipe, because when it comes to cooking, she "fakes it, til she makes it" (lol).  Today she's going to share a great crock pot recipe for fall.  It's simple, easy, and the ingredients may already be in your refrigerator or pantry as we speak.  Can't get easier than that right?  And the big plus... it can be made 100% gluten free which is a big plus for Megan, since she's gluten intolerant. I know I have a couple of readers that are always looking for a good gluten free recipe, so I hope you guys enjoy today's recipe!

 (Gluten Free) Slow Cooker Chicken and Veggie Soup
 6 chicken breast tenders
1 cup frozen sliced or diced carrots
1/2 cup frozen peas
1 cup frozen cut green beans
3 Tbs Minced Onion or 1/2 chopped raw onion
1 tsp sage
1 tsp garlic powder
1/4 tsp thyme
1/8 tsp nutmeg
1 32 oz box chicken broth (gluten free)
1 c. water
2 cups white or brown rice cooked (optional)


Place chicken, veggies, broth and water in slow cooker and stir.  Then add all spices, and stir. Then place the lid on and set for high 4-6 hours. When the chicken starts to float on the surface, sometime after the 4th hour (if cooking on high for 6 hours), check it to see if it's done.  If it's done, shred or cube chicken into pieces. Serve with bread (gluten free or not), or over rice.

(Image credit Megan)


Another perfect fall recipe, right? This sounds delicious! In case you need some gluten free goodies to go with this, you can visit Absolute Mommy for GF Banana Chocolate Chip Muffins, GF Pumpkin Chocolate Chip Muffins, or Nutella Crispy Rice Treats.  

Thank you so much, Megan, for sharing all of these gluten free recipes with us! I can't wait to try out this soup. It sounds like the perfect comfort food dinner! And comfort food always makes me happy!


Monday, October 1, 2012

- quick recipe of the week -


Hi everyone...another start to another week...hopefully it's a great one for everyone!

Today I'd like to introduce you to Lindsay, from Little Mudpies. Lindsay's blog is a mishmash of her daily adventures of being a wife to an amazing man and Momma of two little boys and a sweet little girl puppy named, Oatmeal. On her blog, you'll find recipes for yummy treats like Caramel Apple Rice Krispie Treats and Chocolate Eclair Cake. DIY tutorials for Halloween Garland with Lights and her most popular Heatless Curls. You'll even get a glimpse inside her world, with her Momma Tales. 


(Image credit Lindsay)
When I asked Lindsay if she would share a dinner recipe with you guys, she immediately said yes! She admits, she hasn't always loved to cook, but since she became a momma, she feels like it's her duty to at least try to feed her kids good, healthy, home cooked meals. (My thoughts exactly Lindsay!)

Today Lindsay is sharing the recipe for Vegetable Tortellini Soup. It's one of her family's favorites and with the cooler weather coming, she figured it would be perfect to share.

Vegetable Tortellini Soup
2 Tablespoons Oliver Oil
1 Medium Onion, Chopped
1 Medium Zucchini, Chopped
1 Medium Yellow Squash, Chopped
1 Medium Carrot, Peeled and chopped
6 Cups chicken stock (can use vegetable also)
2 Teaspoons basil (fresh or dried)
1 Bay Leaf
1 Can Diced Tomatoes
1 Package of Tortellini (fresh or frozen)
2 - 3 Tablespoons Parsley (fresh)
1 Tablespoon Garlic, Minced
Salt and Pepper to taste

Heat the oil in a large sauce pan on medium heat. Add all the veggies and sauté for 8-10 minutes or until the onion is soft. Stir often. Add the remaining ingredients and increase the heat to a boil. Add the tortellini. Set soup to a low boil cook for about 2-3 minutes. Reduce heat and let simmer for about 10 minutes. Stir in the salt, pepper and parsley. Remove bay leaf before serving.

(Image credit Lindsay)


What a perfect fall recipe! Thank you so very much Lindsay, for sharing this recipe! If you're interested in meeting Lindsay, visit her blog or connect with her on Facebook or Twitter.


Follow this blog with bloglovin

Follow on Bloglovin